Plan a Tour Day
Five homes, one route, and bring your partner along
5 min read
Tour days have a way of falling apart. Three open houses with overlapping windows, two private showings across town, addresses scattered between texts and a notes app, and a partner asking "where are we going after this one?"
OpenHomeVue has a Trips feature for exactly this: pick the homes, set the day, put the stops in driving order, and share one link with everyone coming along. Here is how to run it.
This article walks through building the tour day, managing the stops, sharing the plan, and handing the route to your maps app.
Build the tour day, on the Web App or Mobile App
Trip planning lives in OpenHomeVue Trips, and there are two ways to start.
Start with a trip
Planning ahead with a specific date and time in mind? Create the trip first.
- Go to the Trips page on the Web App, or the Trips tab on the Mobile App.
- Click the Add trip button on the web, or tap the + button on mobile.
- Pick the trip date, plus a start and end time.
- Confirm with the Create trip button.
- Head to your Watch List and add the homes you want to tour.
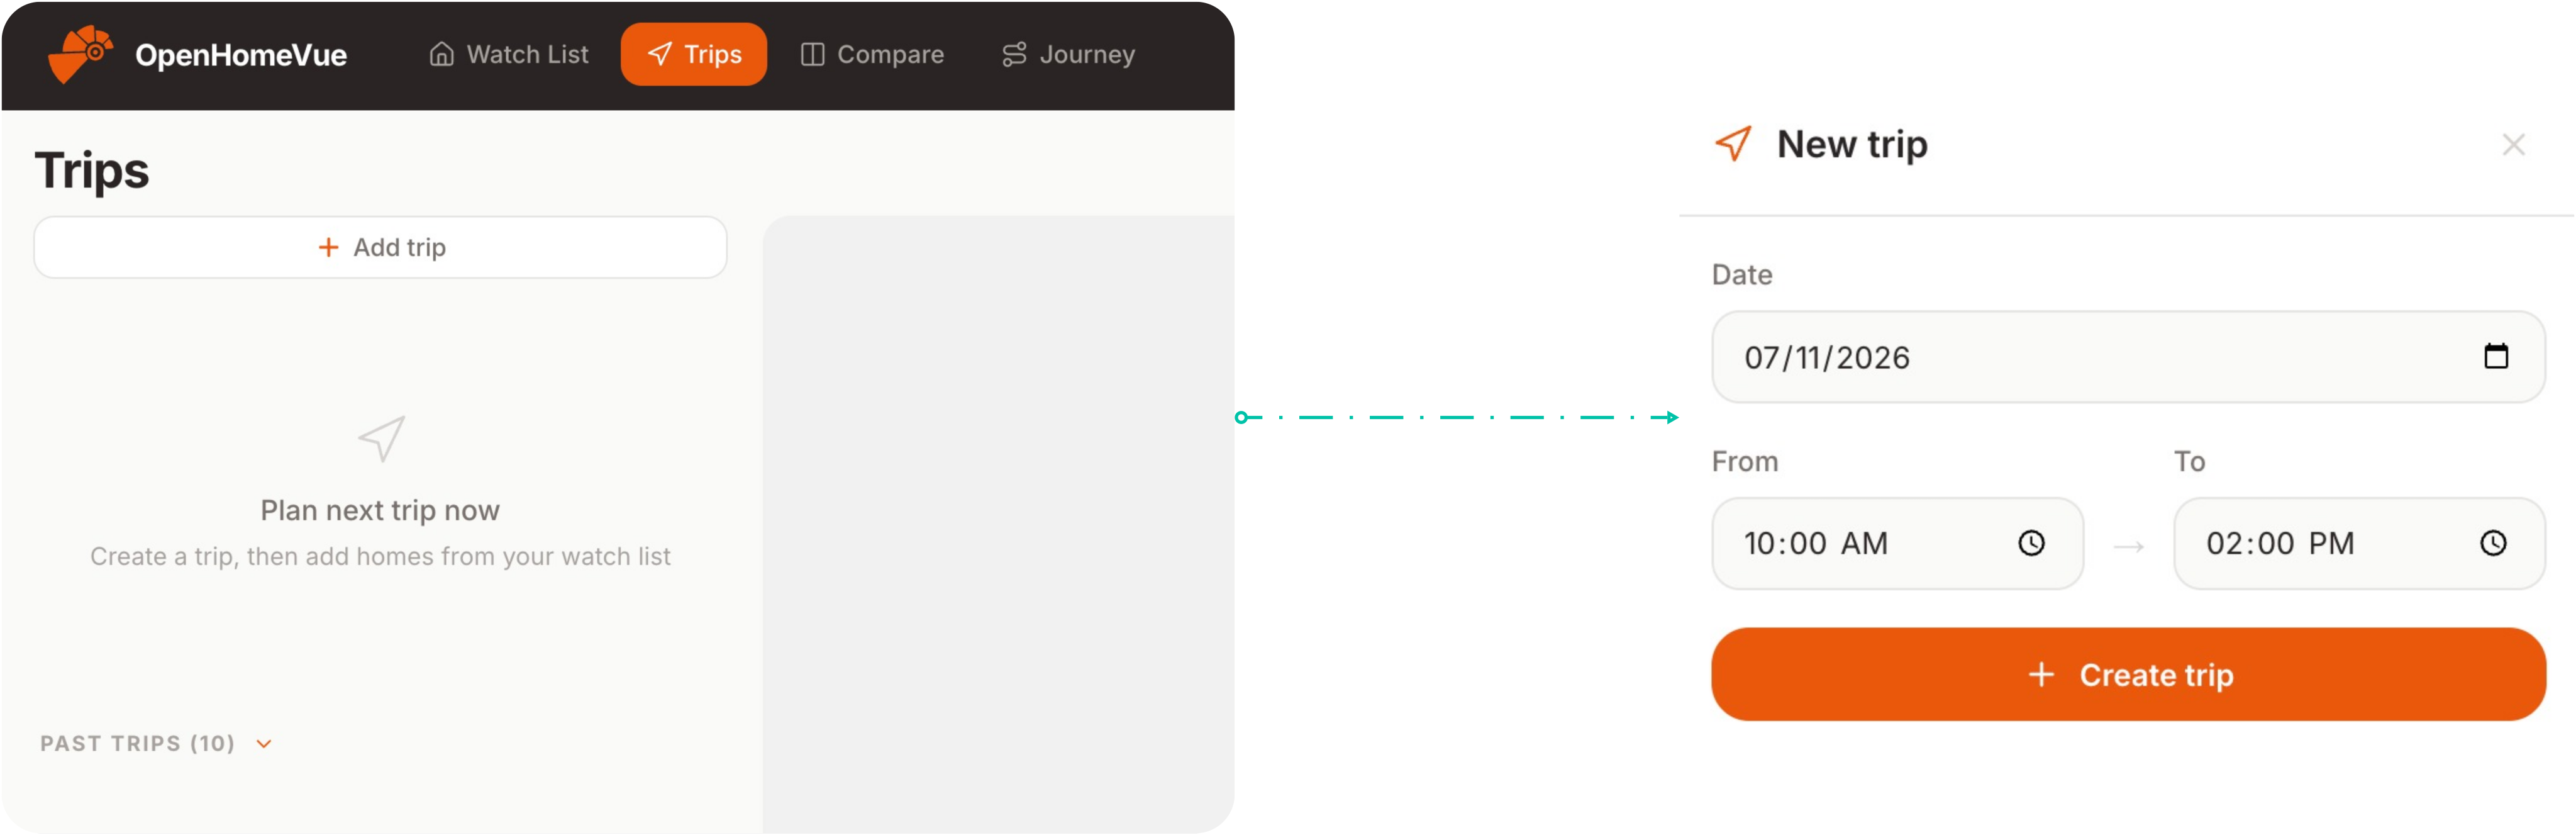
Create the trip first: pick the date and the time window, then fill it with stops.
Start from a Watch List favorite
Have a few favorite homes you want to see in person? Add them to a trip, existing or new.
- On your Watch List, find the home you want to visit.
- Click the Add to trip quick action on the property card (hover over the card to reveal the quick actions), or use Add to trip in the property details panel.
- In the Add to trip dialog, pick the trip to group the visit under, or click Create New Trip at the bottom.
- Creating one there asks for the same date plus start and end time, and confirms with Create trip and add property.
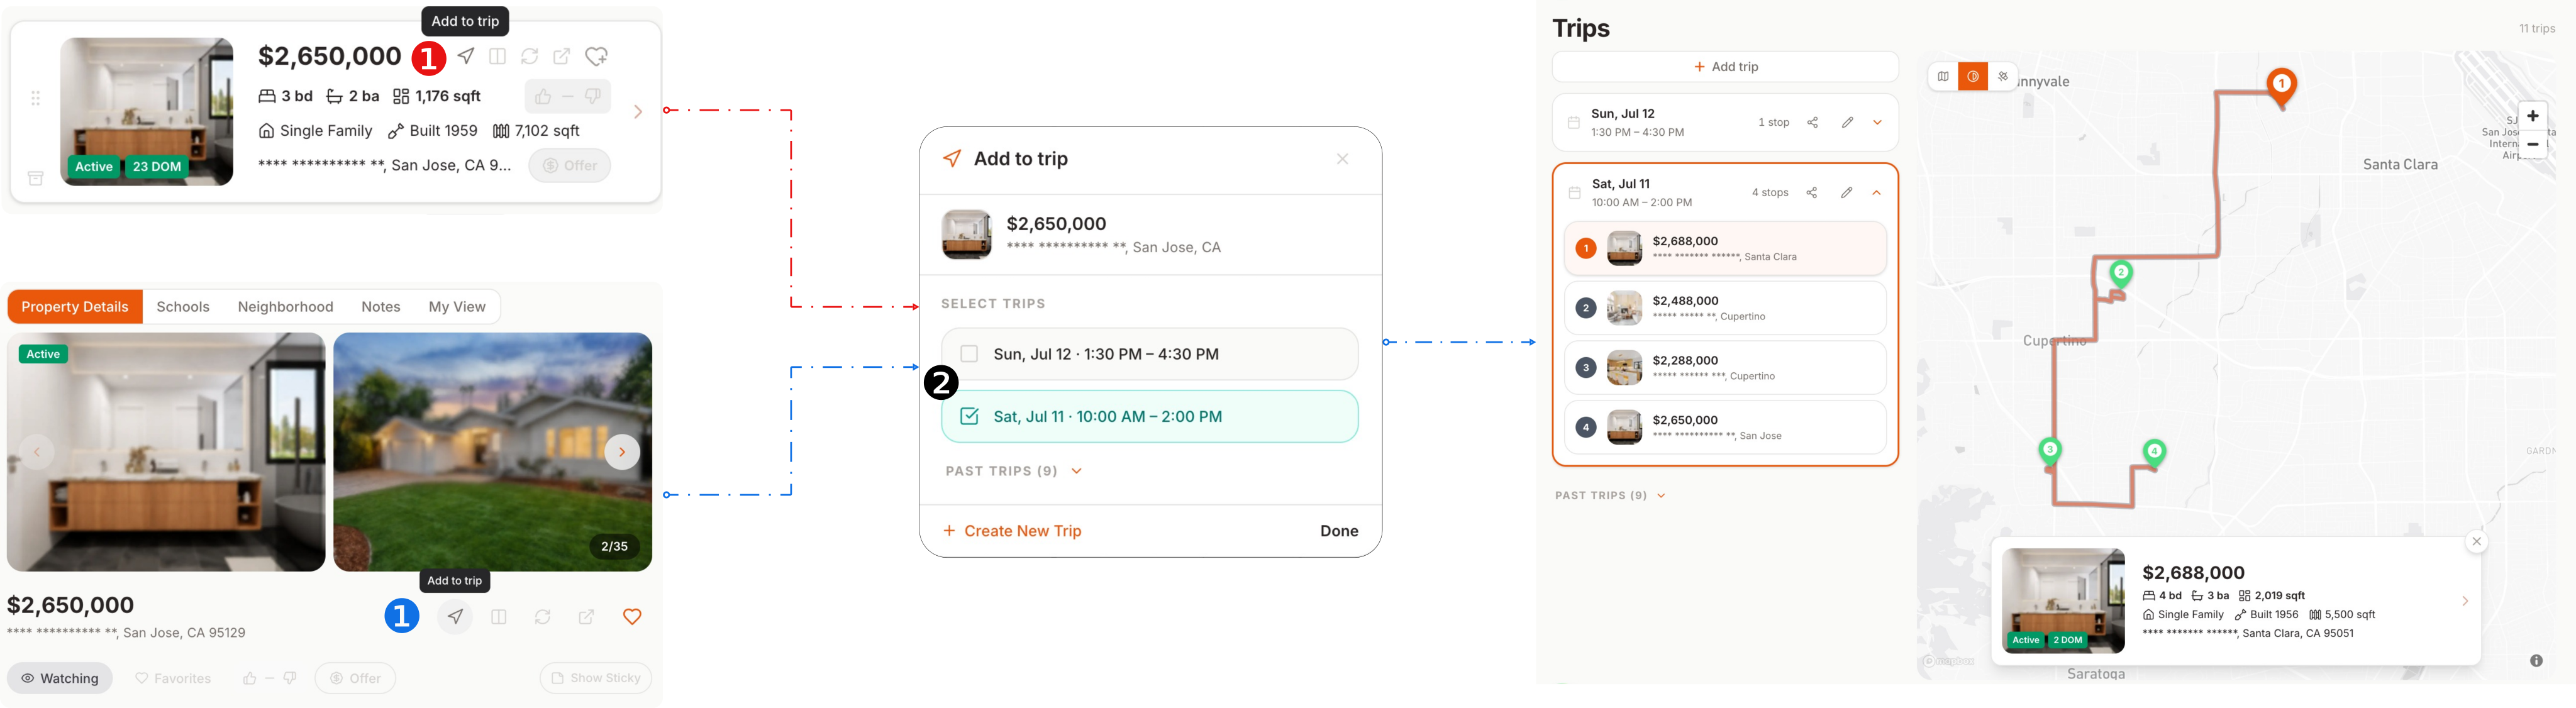
From the Watch List: the Add to trip quick action drops a home into any trip, existing or new.
Manage your trips
Once the stops are in, the trip card is mission control.
Edit the date, the times, or the starting location, remove a stop, or delete the whole day and start over. Drag the stops by their number badge into the order you want to drive them, and the map redraws the driving route as you go, with the total distance and drive time. Watching the route makes the bad orderings obvious: if the line crosses itself, keep dragging.
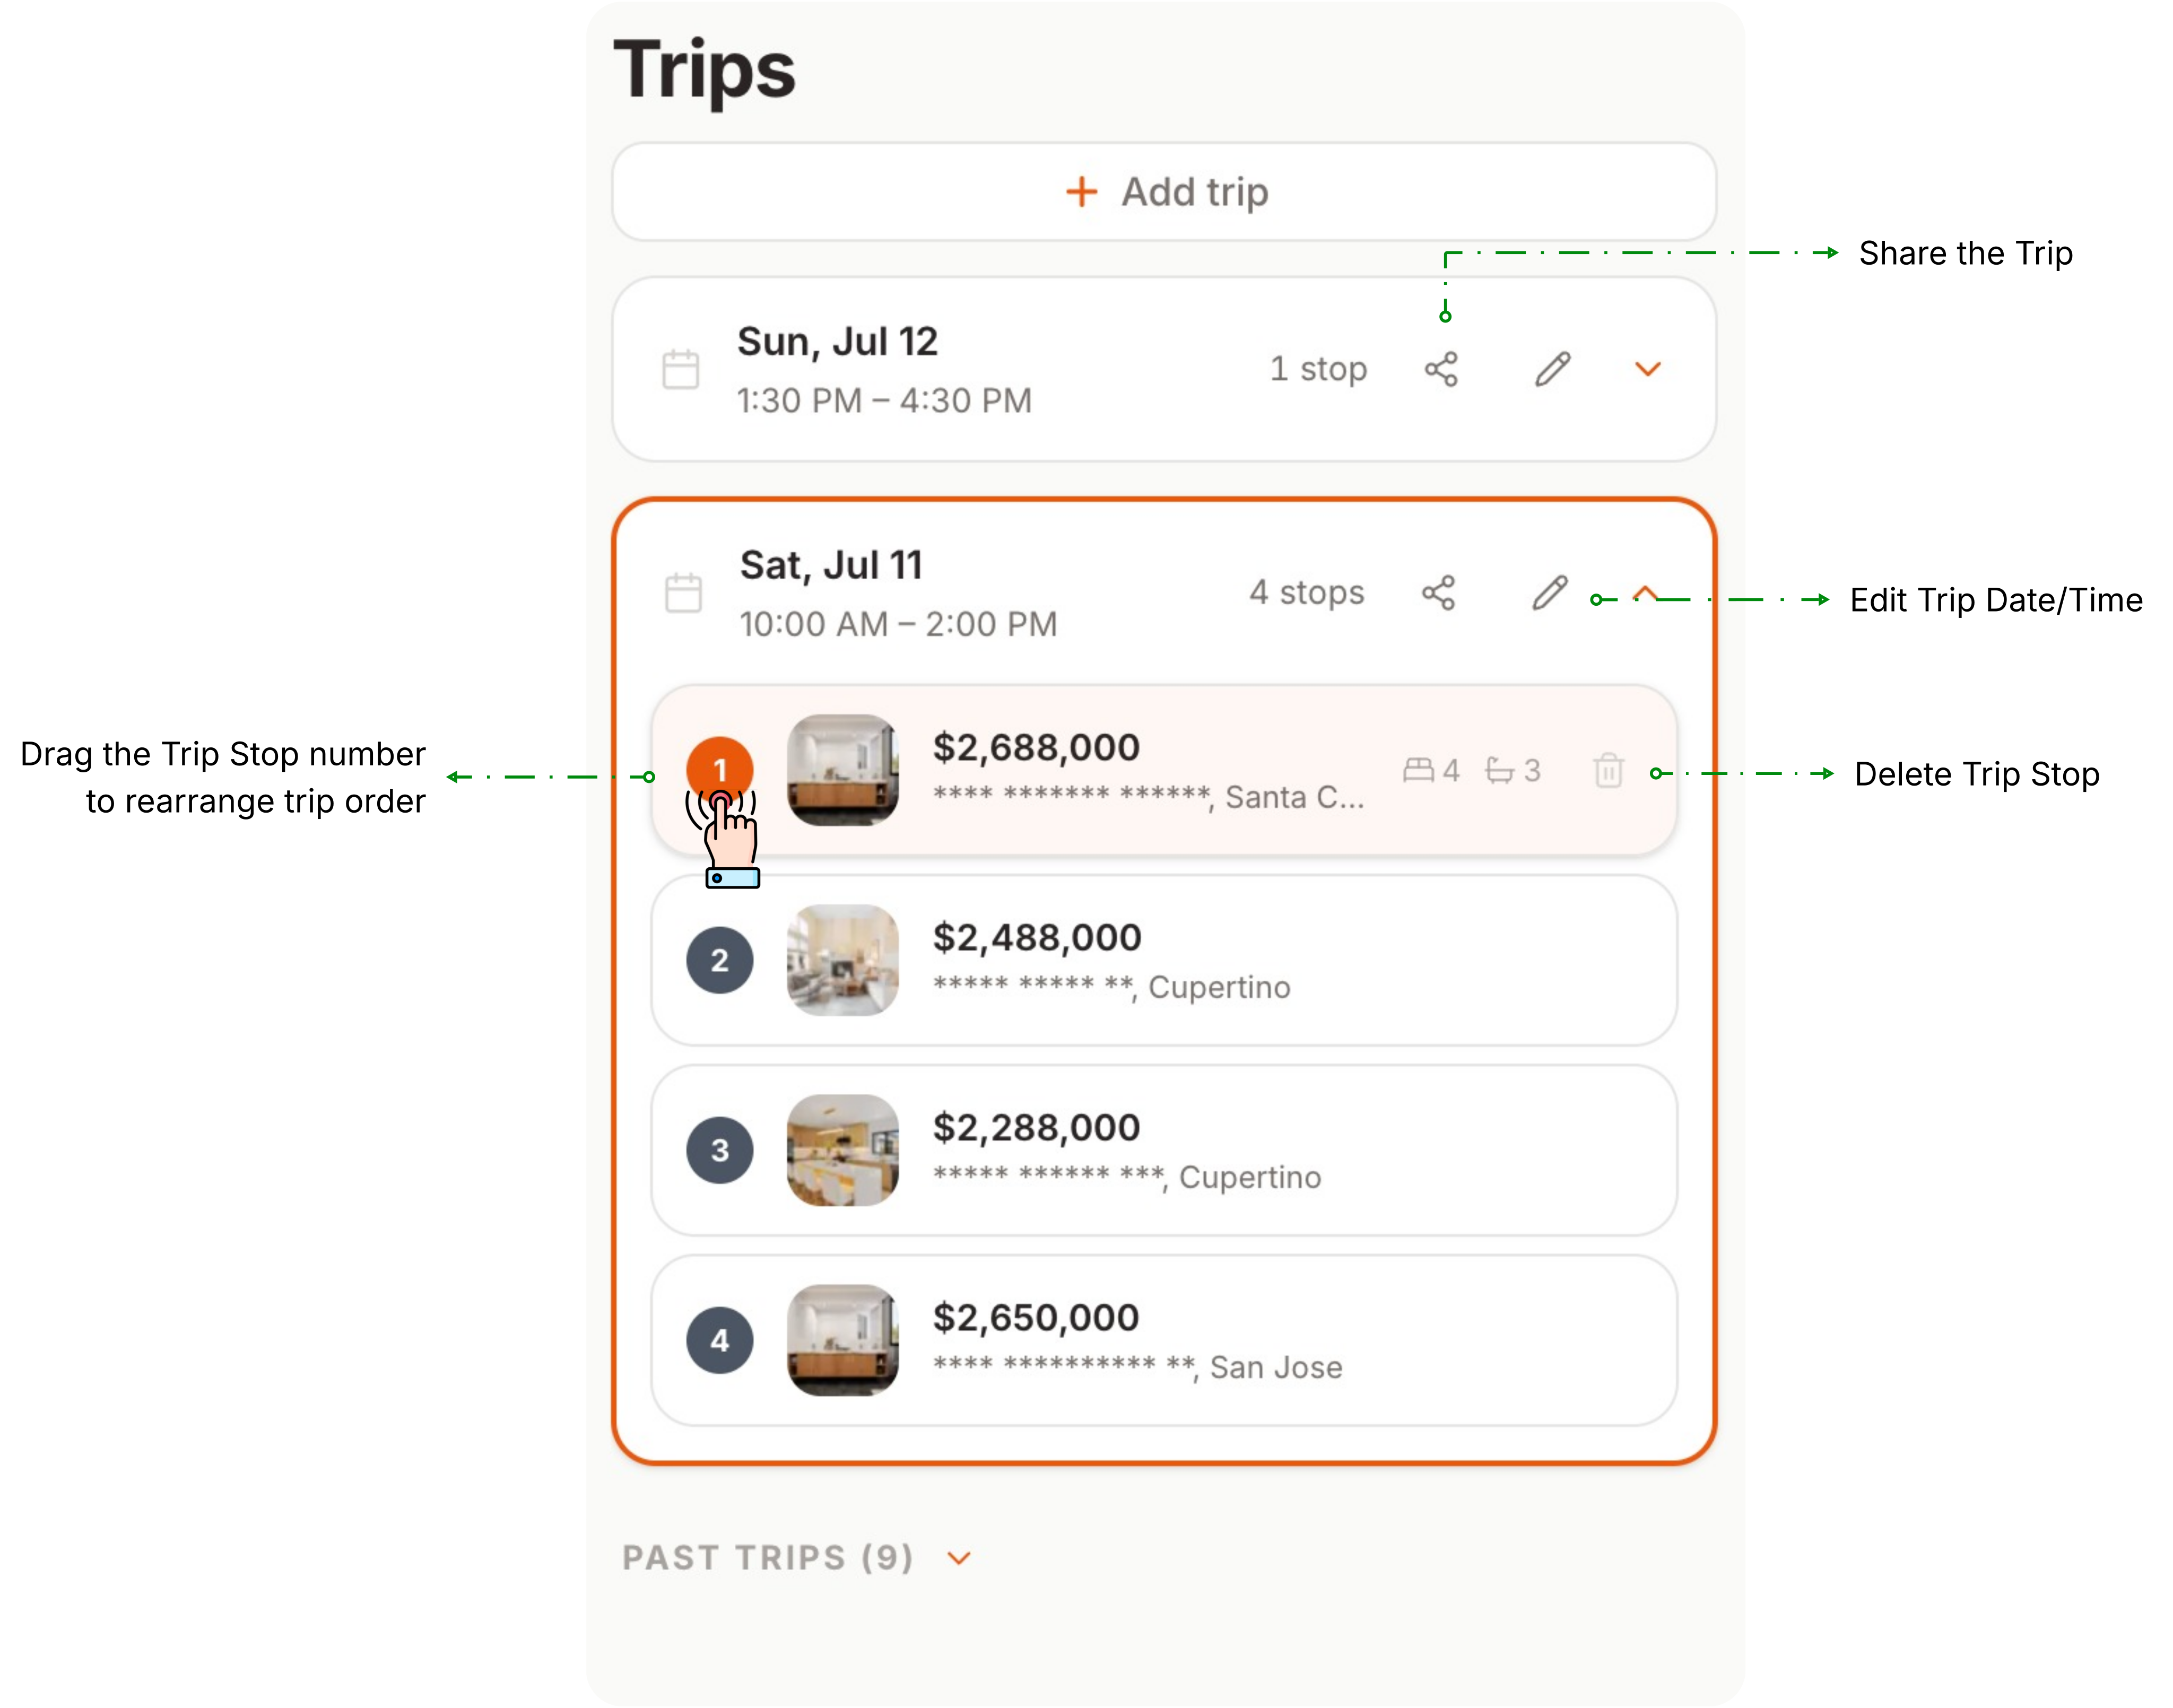
Drag the stops into driving order; the map redraws the route, with total distance and drive time.
Share Trip
A tour plan only works if everyone has it.
- On the trip card, click the Share Trip icon.
- Click Copy Trip Link, and send the link to your partner, your agent, whoever is joining.
- They open a clean read-only page with the stops, times, and route. (An OpenHomeVue account and sign-in are required to view it.)
The link stays good even as you edit. Reorder the stops the night before and everyone who has the link sees the current plan, not a stale copy.
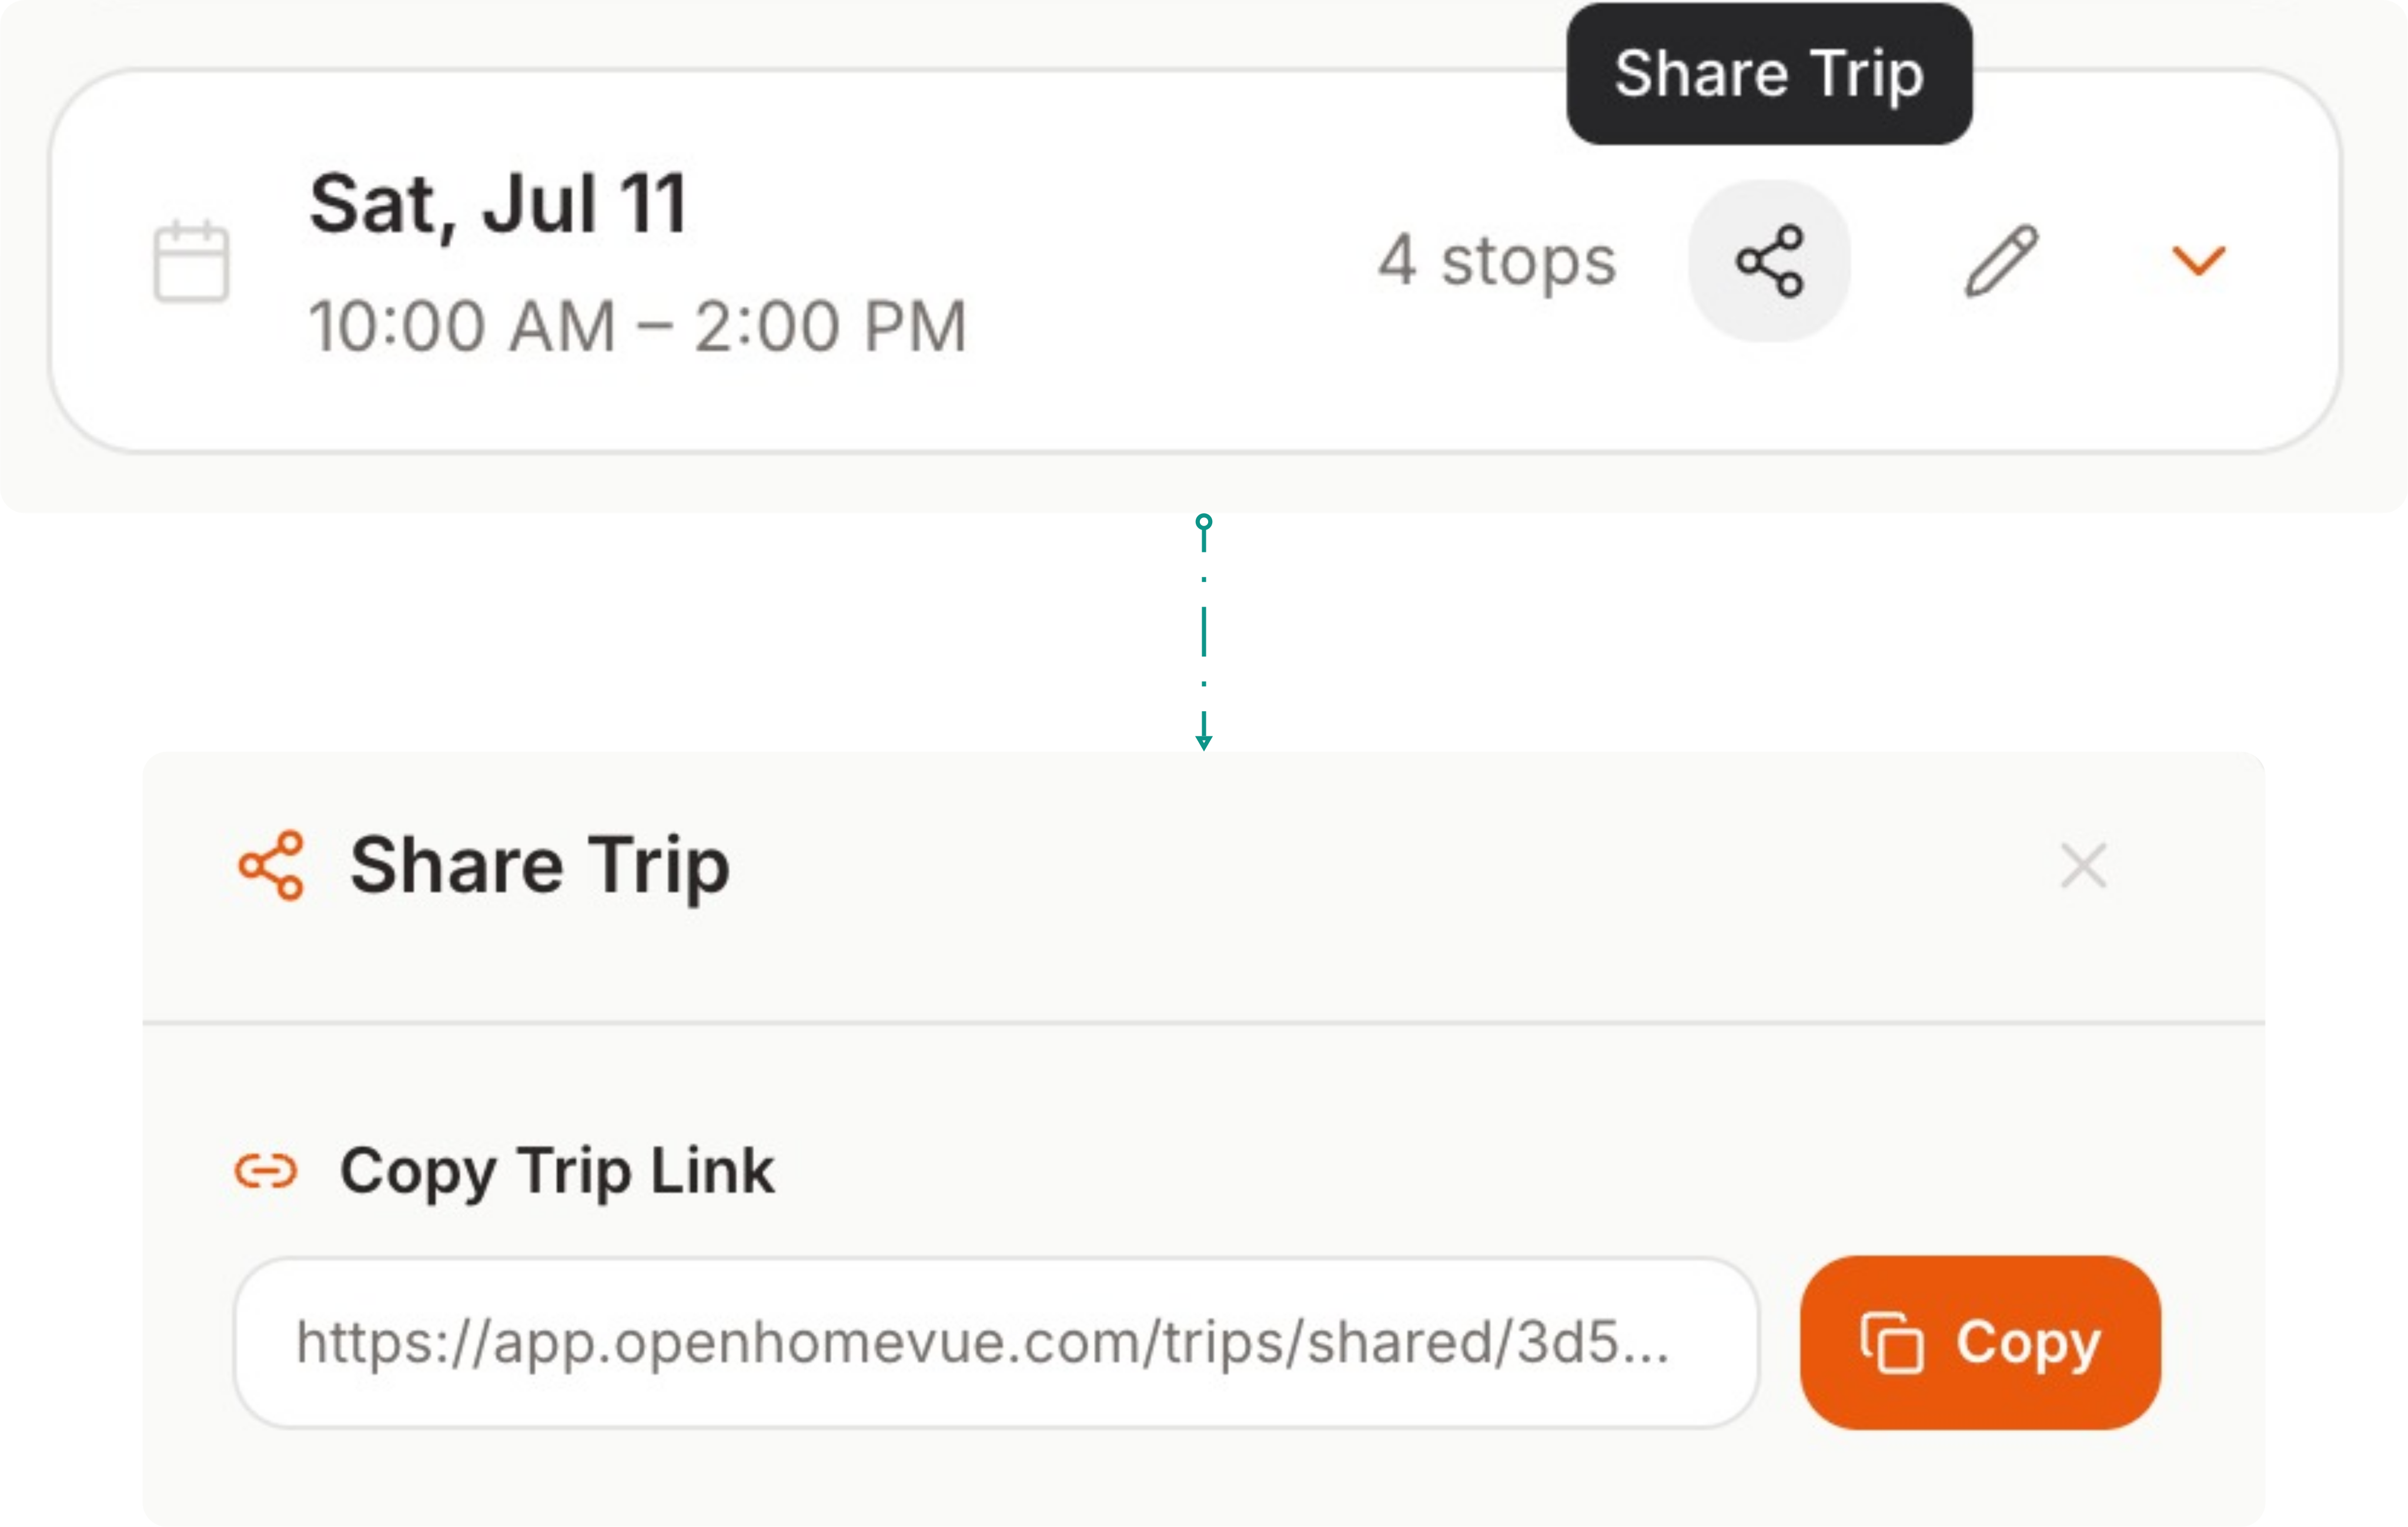
One link for everyone. Edits stay live behind the same link.
Hand the route to your maps app
When it is time to drive, you do not re-enter five addresses.
- Open the trip on your phone and tap the share icon.
- Choose Open in Apple Maps or Open in Google Maps, both with multi-stop directions.
- Your whole tour opens as one route, every stop already in order, and your maps app takes it from there: live traffic, turn-by-turn, the usual.
Plan in OpenHomeVue, navigate in the app you already trust.
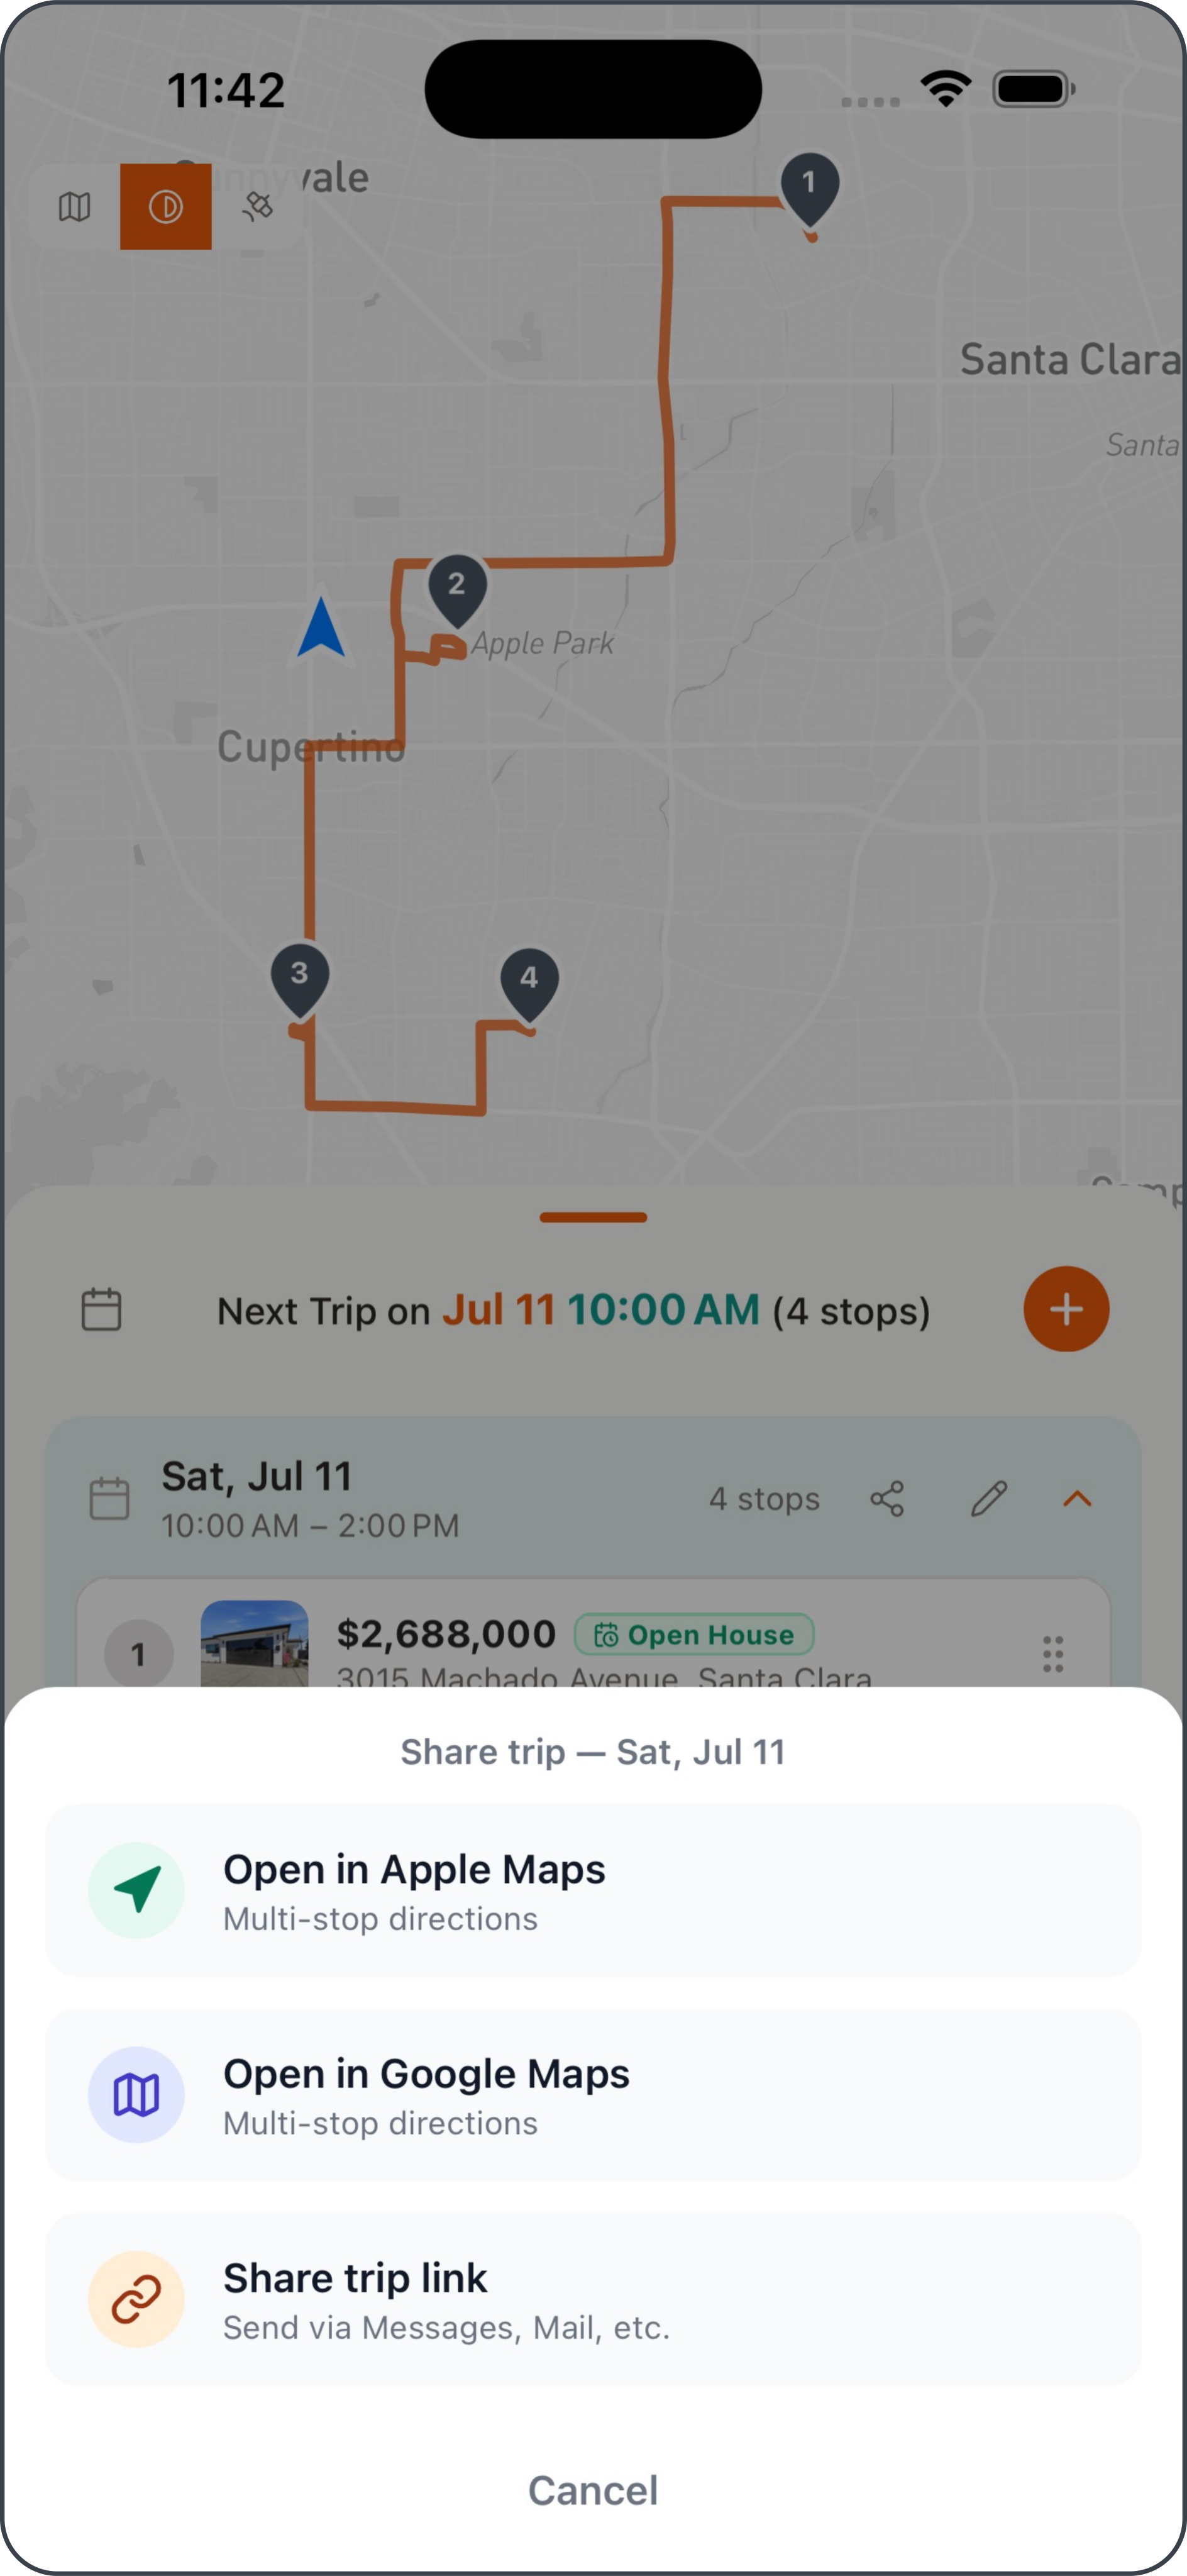
One tap sends the whole tour, stops in order, to Apple Maps or Google Maps.
One more thing: bring your notes
By the third home, the details of the first one start to blur. OpenHomeVue lets you take contextual notes: notes pinned to a risk card, a school, or the listing data, right where the context lives. Photo notes with captions are supported too, so record what you saw while you are still at the curb. That is its own walkthrough: see Take notes.
Related how-tos
More walkthroughs for the research phase are on the way. In the meantime:
Updated Jul, 2026